Adding approval rules
Approval Rules allow you to set up a specific approval processes for items in Asset Essentials. Once approval rules are created, they will be applied to routing work flows including work order routing or project routing. *Note: Approval routing is not yet supported in the Asset Essentials Mobile App. If you rely heavily on the App at your organization, please take this into consideration.
Adding an approval rule
General
- Click on the Admin menu icon, then select Configurations.
- In the Misc section, click Approval Rules.
- Click the New button.
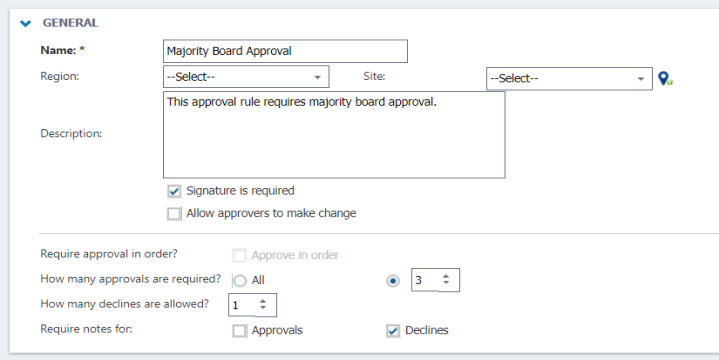
- In the General section, enter a Name for the rule.
- If you would like the Rule to apply to a specific Region or Site, select the appropriate Region or Site from the drop downs.
- Enter a Description.
- Check the Signature is required box, if you would like the approver to be prompted with a signature window when approving.
- If you would like to give the approver the ability to make changes to the work order before approving it, check the Allow approvers to make change box. *Note: If an approver modifies information on the work order that causes a conflict with your account's work order routing, the work order will be removed from automatic routing and will function like a work order requiring manual assignment.
- Select whether you would like to require All approvers or a specific number of approvers. *Note: You must add approvers to the rule in order to select a number of approvers in this step.
Bright Idea:No one can override a work order waiting for approval if they are not in the approval rule. This includes Global and Account Administrators. We recommend selecting a specific number of approvers to prevent organizational bottlenecks. For example, if a designated approver is out on vacation and All is selected, no one can override that approval until he or she returns.
- If you selected All approvals are required and the work order must be approved in a specific sequence, check the Approve in order box.
- Enter the number of declines allowed in the How many declines are allowed field. A request will be declined if the amount of declines given by the approvers exceeds what is entered in this field.
- To Require notes for either Approvals or Declines, check the appropriate boxes.

Approvers
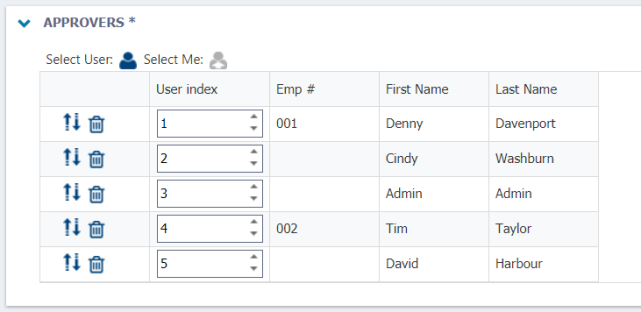
- Click the Select User icon (
 ) to add approvers to this rule. If you would like to add yourself as an approver, click the Select Me icon (
 ).
). - In the Select User window, check the box next to any users you would like to make an approver, then click the Select button.
- If you checked the Approve in order box in the General section, click the rearrange icon (
 ) and drag the approver's names in the proper approval order.

